The Best Beginner’s Guide to Drawing Facial Features
Disclaimer: Just a heads up, I’m still a beginner artist and I do a lot of research to make sure the information I share is accurate. But since I’m not a professional yet, I might be slightly off on some things. Feel free to let me know in the comments if there’s anything I could improve! This blog post is still a work in progress.
Hi Fellow Artists! Have you ever stared at a blank page, pencil in hand, wondering how to bring a face to life? You’re not alone! As a beginner artist myself, I’ve been (and still am) there. The facial features are the often referred to as the keys to the soul. They are what give your faviourte characters life, whether that’s your faviourate actor, your faviourate game character, or your faviourate anime character! Drawing the facial features are so important to master. And it takes years to truly master, which is why I hope over the years this blog post will develop along with me.
I’ve designed this guide specifically for beginners like us, breaking down the seemingly complex art of drawing facial features into bite-sized, manageable steps. This will be be a big overview of all the elements of the face. Whether you’re sketching your first portrait or creating a unique character, we’ll explore the fundamentals together. So, grab your sketchpad, and let’s embark on this exciting artistic adventure together!
Introduction to Basic Facial Proportions:
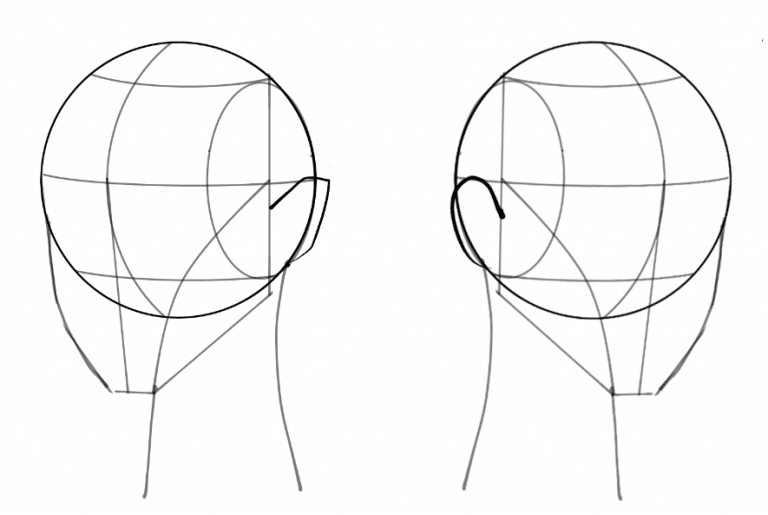
The placement of facial features can vary depending on the character, the person, and a bunch of other factors. But we will go over the standard locations on the loomis head. Once you know the Loomis head, below are some easy to remember rules & guidelines for remembering the placements of the facial features:
- The top line on the Loomis head is the Hairline.
- The Eyebrow line in the middle.
- Slightly under the Eyebrow line is the Eye location.
- Eyebrows typically start closer to the center of the face.
- Men have thicker eyebrows, women typically have thinner angular eyes.
- We need to be able to fit 4-5 eyes across the face. (3 in the middle and half an eye on both sides)
- Then the bottom of the circle, or slightly above, is the nose line.
- Typically there will be space between the top of the head and the hairline and the nose line and the bottom of the circle.
- From the nose line to the chin we divide it into 3rds. The top 3rd is the top of the mouth line. Typically this lines up with the bottom of the circle, but it can change depending on the proportions of the face.
- For the nose in front view just draw some shallow V shapes, or a circle just to represent the nose in your rough drawing phase.
Common proportion mistakes and how to avoid them
This section is under progress
Basic Overview of the Human Skull:
This section is under progress